Short answer
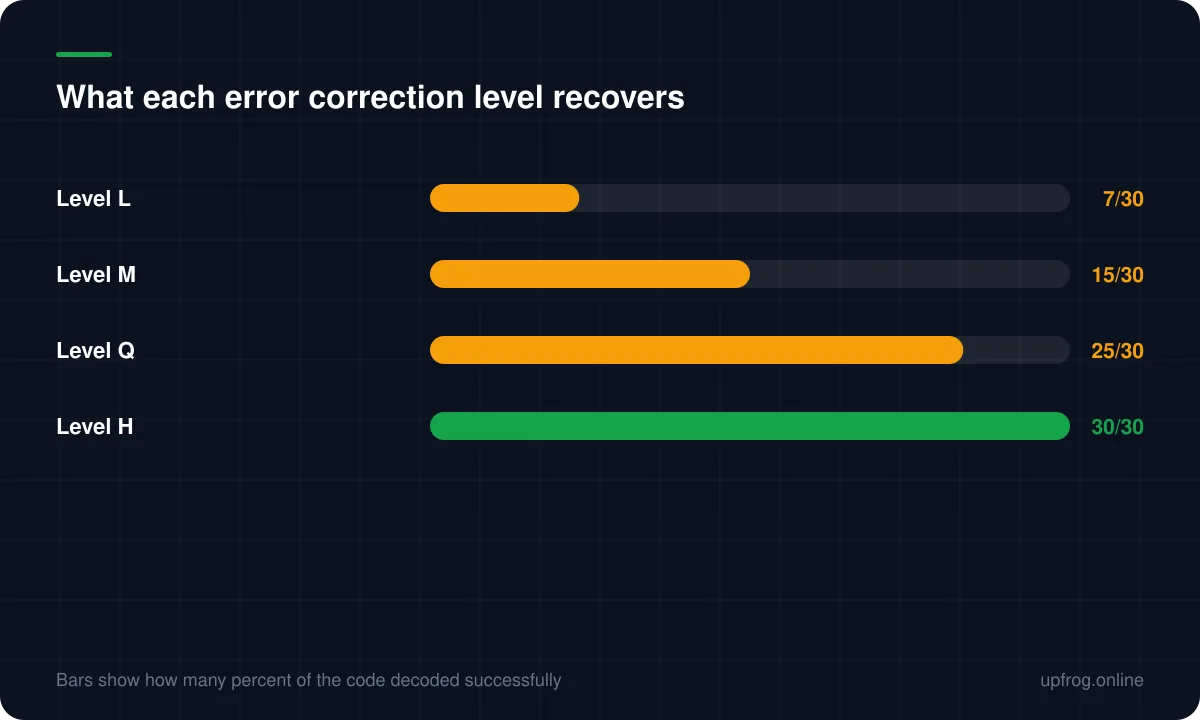
Error correction adds redundant data so a damaged code still decodes. L recovers about 7%, M 15%, Q 25% and H 30%. Higher levels need more modules, so a level H code is denser than a level L one holding the same content. Use H when there is a logo, Q as a general default.
What error correction actually is
A QR code does not just store your text. It stores your text plus a block of mathematically derived redundancy, calculated using Reed–Solomon coding. If part of the code is destroyed, the decoder can reconstruct the missing pieces from what survives.
This is why a code with a coffee stain, a crease or a logo punched through the middle still works. It is not tolerance or luck — the redundancy was designed in, and the decoder is genuinely rebuilding the lost data.
The level you choose decides how much redundancy gets added, and therefore how much damage the code can absorb before it becomes unreadable.
The four levels
The specification defines four, and their names are just letters rather than abbreviations of anything useful.
- L (Low) — recovers roughly 7% of the code. The smallest, densest-data option.
- M (Medium) — roughly 15%. A reasonable middle ground for clean digital use.
- Q (Quartile) — roughly 25%. A good general default for anything printed.
- H (High) — roughly 30%. Required if you are covering part of the code with a logo.
The trade-off nobody mentions
Higher error correction is not free, and this is the part that surprises people. The redundancy has to be stored somewhere, so raising the level increases the number of modules needed for the same content.
More modules at the same physical size means each module is physically smaller. And smaller modules are harder for a camera to resolve, especially at distance or on absorbent paper.
So there is a genuine tension: level H protects against damage, but it also makes every individual module smaller, which is itself a risk. Cranking everything to H is not automatically the safe choice.
How to choose
Work from the conditions the code will live in rather than from a general preference.
- 1
Start at Q for anything printed
It absorbs ordinary print defects, handling and mild glare without inflating the code much.
- 2
Go to H if there is a logo
Any centre logo removes real data. Our generator raises the level automatically when you add one, because forgetting is such a common failure.
- 3
Drop to M or L only for clean digital display
A code on a webpage or a slide is never scratched or smudged. If the payload is long and the code looks dense, a lower level buys back real module size.
- 4
Re-check the module size afterwards
Changing the level changes the module count. Look at the code again at final print size before you commit.
The 30% figure is a budget, not a guarantee
Level H can recover about 30% of the code. That number gets quoted as though it means a logo may cover 30% of the area, which is not quite right.
The budget is shared. Print registration errors, ink spread, glare from a laminate, a scuff on a sticker, camera noise and the angle the phone is held at all consume some of it. If the logo has already spent the entire allowance, there is nothing left for the real world.
In practice, keeping a logo under about a quarter of the width leaves a sensible reserve.
What error correction cannot fix
It is worth being clear about the limits, because error correction is often treated as a general safety net. It is not.
It cannot help if the decoder never finds the code in the first place. Locating a code depends on the three corner patterns, and if those are distorted — by heavy restyling, by a fold, or by a shape combination that breaks their proportions — the decoder gives up before error correction is ever consulted.
It also cannot rescue low contrast. If the decoder cannot separate dark modules from light ones, it is not reading damaged data; it is reading no data.
Frequently asked questions
- Which error correction level should I use by default?
- Q for anything printed, H if you are adding a logo. Only drop to M or L when the code is displayed digitally and the payload is long enough that density becomes the bigger risk.
- Does higher error correction make the QR code bigger?
- It increases the number of modules, not necessarily the physical size. At a fixed print size, that means each module gets smaller, which can make the code harder to scan at distance. It is a genuine trade-off rather than a free upgrade.
- Can I put a logo on a code with level M?
- You can, but you should not. Level M only recovers around 15% of the code, and that has to cover print defects as well as your logo. Raise it to H whenever any part of the code is obscured.
- How much of a QR code can be damaged before it fails?
- Up to roughly 30% at level H, but that assumes the damage is distributed and the three corner patterns are intact. Damage concentrated on a corner pattern can break a code well before you reach the theoretical limit.
Sources
Specifications and primary documentation referenced above.